Operation manual - 4.Manual loading
 目次
目次- Loading pattern calculation of single item pallet
- Container・Truck Loading / Exterior Box・Mixed Pallet Simulation
- How to do mix container loading simulation|Manual data entry
- How to do mix container loading simulation |Data entry macro
- Explanation of optimization setting conditions
- How to set the cargo placement direction
- How to share simulation results
- How to install the manual-loading program
- How to operate single item full load calculation
- How to set the cargo color
- Mixed pallet simulation
- Manual loading
- User management
- Others
 FAQ
FAQ9.Check proxy server settings
Check proxy server settings
1 Check the proxy server URL
Check the URL of the proxy server in the system section.
VM-Cloud's transaction interlocking system is a mechanism that checks the version every time the transaction screen is started and automatically downloads the latest version of the program from the server.
VM-Cloud's transaction interlocking system is a mechanism that checks the version every time the transaction screen is started and automatically downloads the latest version of the program from the server.
2 Enter the proxy server URL in Internet properties
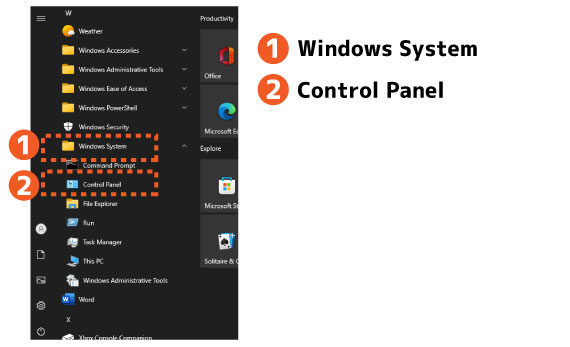
1.Click the "Start" ⇒ Windows System Tools ⇒ "Control Panel".
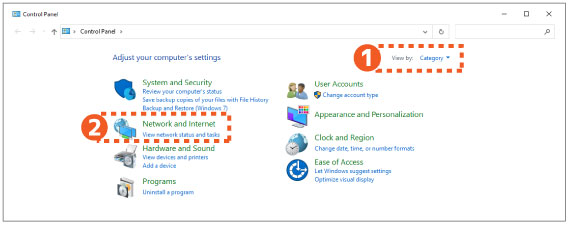
2.Select "Category" in "View by" and click "Network and Internet".
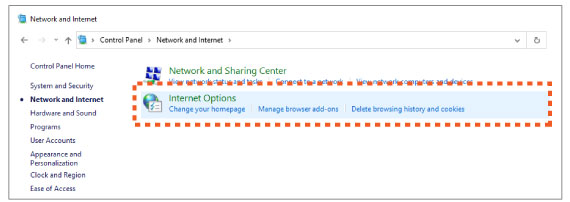
3.Click "Internet Options".
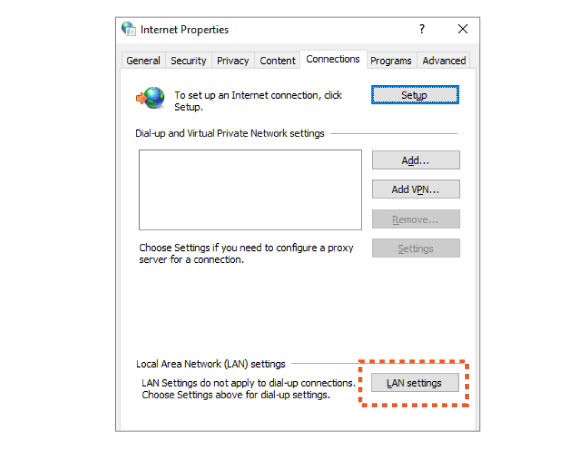
4.Click the "Connections" tab on the "Internet Properties" screen.
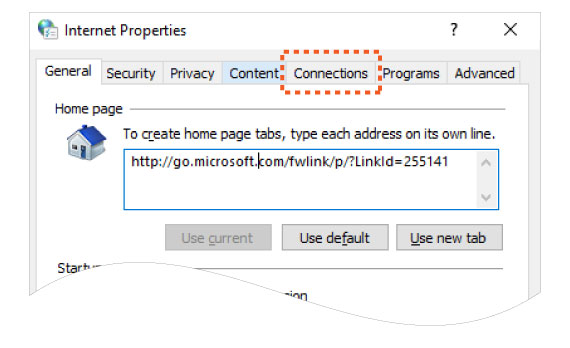
5.Click the LAN Settings button.
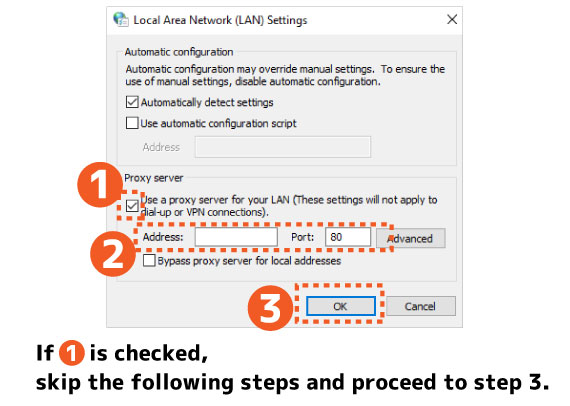
6.Check "Proxy Server", enter the URL of the proxy server you received from the system department in step 1, and click the "OK" button.
7.Click the "x" button to close all open windows.
8.Log in to VM-Cloud and check the movement of the screen.
If the screen is displayed normally, step 3 is unnecessary.
If not, go to step 3.
If the screen is displayed normally, step 3 is unnecessary.
If not, go to step 3.
3Enter the proxy server URL in notepad
1.Open the "C:\Vanning Master Plus" folder.
Select the file "Cont_Std_Cloud.exe.config", right-click and click "Open with" ⇒ "Notepad".
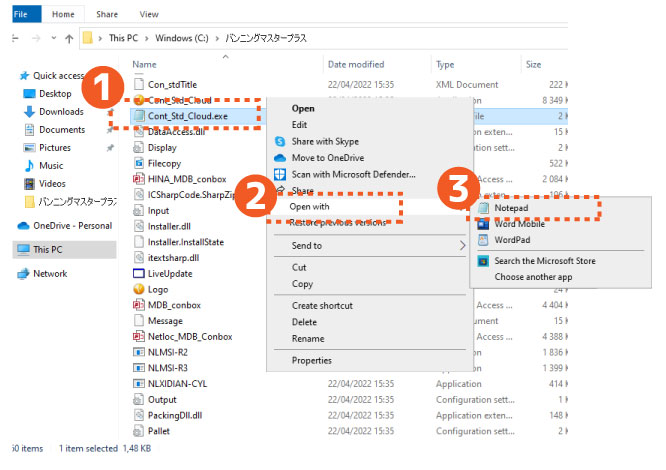
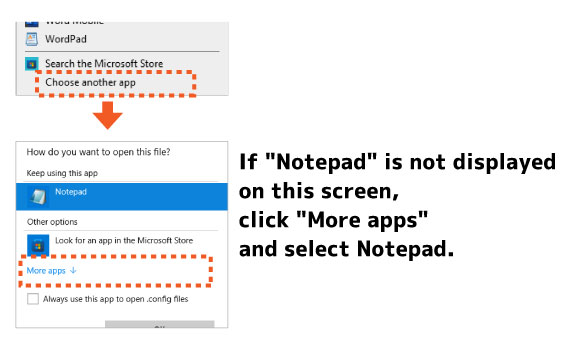
If Notepad is not in the menu, click "Choose another app".
2.Enter the URL of the proxy server in the "Cont_Std_Cloud.exe.config" file opened with notepad.
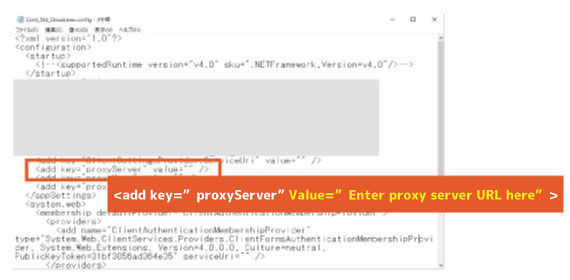
The red part below is the location of the proxy URL.
Enter the full URL including http (or https).
Example: <add key="proxyServer" value="https://netloc.jp" />
3. Click "File" ⇒ "Save" in Notepad and close Notepad.

4. The setting is completed.
Log in to VM-Cloud and check the movement of the screen.